How to Construct a Pitcher’s Mound
The pitcher's mound requires the most attention on your field. A properly built and maintained mound will help prevent injuries to your pitcher and will give you a home field advantage.
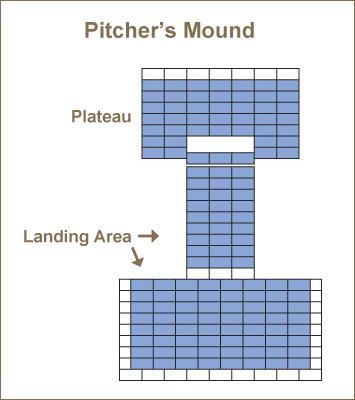
The mound for high school through major league is a circle that is 18 feet in diameter and 10 inches higher than home plate. See Basic Mound Specifications section for diagram.
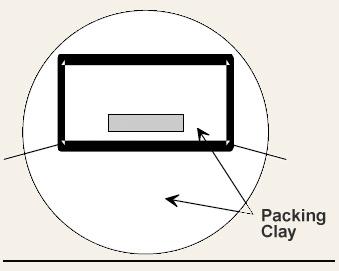
Construct the pitcher's mound with a high clay content mound building soil and use specialty packing clay designed for the table and landing areas. Specialty packing clay provides a solid footing and longer wear. Turface® MoundMaster® Blocks and Turface Professional Mound Clay® are made from the finest materials and produce professional results.
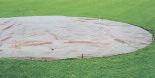
Always keep the mound covered when not in use.
Recommended Equipment and Materials
|
|
|
Obtain Proper Distance, Alignment and Height
For a high school, college or professional field, the front of the pitcher's plate (rubber) should measure 60 feet 6 inches from the apex of home plate. The top of the rubber must be 10 inches higher than home plate. To find the correct measurements for your specific field, see the Basic Mound Specifications section.
- The pitcher's rubber is 24 inches long. Take a pencil and mark a line down the center.
- Take a string from the apex of home plate and extend it to the second base peg.
- Measure 60 feet 6 inches from the apex of home plate and sink a spike. This marks the front of the rubber.
- Take a transit level and obtain a reading off home plate. The top of the pitching rubber must be 10 inches above home plate. Add or reduce height of the mound.
- Square the rubber into position by taking a measuring tape and measure from the front left corner of home plate to the front left corner of the pitcher's rubber. Do the same on the right side. When these two measurements are the same distance, the rubber will be squared. Make sure that the rubber measures 12 inches on each side of the anchored spike. HINT: If building a mound from scratch, it is a good idea to place a solid concrete block under the rubber to keep it from shifting. Also, fill the hollow tube in a 4-way rubber with dirt for added stability.
Constructing the Collar of the Pitcher's Mound
Once your pitching rubber is in place, it is important to establish a good outline of the pitcher's mound. The following steps will provide proper dimensions and an easy way to get your 9-foot radius. See Basic Mound Specifications section for diagram:
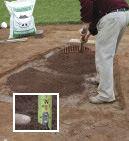
- Measure out exactly 18 inches from the front of the pitcher's rubber and drive a spike. This should be in line with the exact center of the rubber. This is the center of the mound.
- Attach a string to the spike and measure out exactly 9 feet from the spike.
- Keeping the string taut, circle the mound marking the outline. The diameter of the outline should be exactly 18 feet.
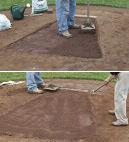
- With an edger or a spade, follow the outline and remove all inside turf to establish a permanent boundary for the mound.
How to Build the Pitcher's Plateau
The pitcher's mound is not supposed to be built up like a peak, but rather it should slope up to a firm and level plateau. This provides a pitcher with a firm, safe playing surface. The plateau should be level with the top of the rubber and measure 5 x 3 feet.
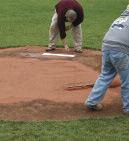
- Place the plateau frame (the plateau frame is made with 2" x 6" boards and the inside measurements are 5' x 3') on the pitcher's mound as the diagram illustrates:

- Assure exact measurements. The inside frame should be positioned 6 inches in front of the rubber, 24 inches in the back of the rubber and 18 inches on each side of the rubber.
- Trace the inside of the frame in the clay with a nail.
- Carefully remove the frame from the mound.
- With a pick, loosen and remove existing soil within the outline to the appropriate depth. The Professional Mound Clay should be 4 inches thick for smaller players and 6 inches thick for high school, college and professional players. One layer of blocks is adequate for any level.
- Loosen or scarify the soil at the base of the hole to assure the new clay will bond to the existing soil. With a square-faced shovel or a spade, make sure the edges of the outline are properly loosened as well.
- Return frame and re-measure for accuracy.
- Once frame is in place, add Turface Professional Mound Clay or MoundMaster Blocks.
- With the Turface Professional Mound Clay add a layer one inch at a time and tamp firm. A vibrating asphalt compactor will save a lot of time and hard work if you have access to one. Scratch up the existing soil and mix with the first inch of Turface Professional Mound Clay to assure a good bond. Lightly water and tamp each 1-inch layer until you reach the desired height.
- With MoundMaster Blocks excavate down 2 to 3 inches deep and place the blocks into the hole. The blocks should be about a ½” to ¾” below the rubber. Water the blocks after they are wedged into place and smear the seams together with a trowel or with pieces of MoundMaster Blocks that have soaked in water
9. It is important to be extremely careful tamping the front of the plateau because the tamp is close to the pitching rubber. By tamping too carelessly, you disturb the rubber.
10. Once the table is constructed, slowly remove the plateau frame. It is important to go slow to avoid breaking edges.
11. After the mound is completely constructed, rake a light coating of infield mix and Turface over the clay for traction and cover the mound.
Watch this video on selecting the right mound clay.
How to Construct the Mound Slope
Because of the risk of injury, it is important to give a pitcher a firm consistent landing area on which to complete a pitch. It is also important for moves to any of the bases. If the pitcher's mound is at its proper height, the slope from the edge of the plateau to the edge of the mound should drop one inch for every one foot of measurement. This slope can be accomplished as follows:
- Use a large nail or spike to outline the landing area. This should start from the front corners of the plateau and continue outward toward the turf.
- With a pick loosen existing soil so your mound building soil will bond to the existing soil.
- Break up clumps with a square-faced shovel or remove with a rake.
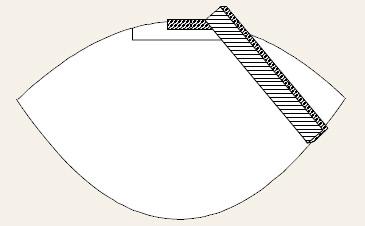
- Place the four foot 1" x 4" on top of the rubber and extend it to the right edge of the plateau. The board should run parallel to the rubber making sure the four-inch side of the board is resting on the surface.
- Place the ten foot 2" x 4" along the right outline of the landing area. The top of the board should rest on the four foot 2" x 4" and the bottom on the board should rest at the base of the mound at the edge of the turf. Be sure that the board is turned on its side so the mound supports its two-inch side. The following will illustrate:
- Bring a wheelbarrow of mound clay and dump it to the left of the ten foot 2" x 4"
- Spread materials along the length of the board. Move any substantial excess away from the board because it will cause too much buildup, making the board too heavy to move. Another person will be needed at this point. One person will be required to handle the top of the ten-foot board near the pitcher's rubber, while another person will need to handle the bottom of the board at the base of the mound.
- In a slow, controlled motion, begin moving the board in a short sawing motion, sliding the board up and down over the four-foot board. It is important to keep the ten-foot board on the four-foot board to avoid damaging the edges of the plateau.
- Continue the short sawing motion as you slowly move the board in a clockwise motion to the other side of the outlined landing area. As you are moving the board you may experience some low spots in the surface. Stop, move the board to the right of the low spot. Bring the mound building clay to the board in front of the low spot. Begin sawing motion again and continue forward.
- Use a mound slope board to measure an accurate slope of the mound.
- Once the entire landing area has been formed through this process, aggressively tamp this area for added firmness.
- Next add MoundMaster Blocks or Turface Professional Mound Clay in the high wear areas (see Home Plate Replacement & Reconstruction and Pitcher’s Mound Maintenance).
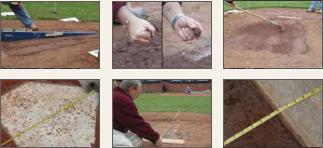
Turface Professional Mound Clay Installation
Easy steps to safe and durable pitching mounds and batter’s boxes. Tools required: tamp, rake, shovel, broom, watering can, and a slope board for the mound.
 |
Excavate the front slope of your mound to a 4" to 6" depth. Batter's boxes and catcher's box to a 4" depth. |
 |
Moisten the bottom of the hole with water. Add an inch of Turface Professional Mound Clay with a rake, cut into the soil for proper bonding. Tamp firmly. Lightly moisten but do not drown, and tamp again. |
 |
Evenly add an inch of new Turface Professional Mound Clay to the area you are working. Tamp until firm. Water the area, but do not drown. Repeat. As you near the last layer, reduce the amount of water you add to the Turface Professional Mound Clay. |
 |
As you reach the top of your Turface Professional Mound Clay area on the mound, use a rake to rough grade the slope in front of the mound. Tamp or roll the slope for a smooth surface. Add Turface Professional Mound Clay to any low spots and use your rake to cut down the high spots. After leveling tamp or roll again. |
 |
Add a final coating of water on the Turface Professional Mound Clay areas once all grades and slopes are set and rolled. Finally, topdress all Turface Professional Mound Clay areas with your infield mix and Turface MVP to match the color of your infield. |
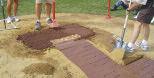
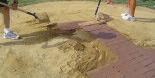
Installing With MoundMaster Blocks
When installing MoundMaster blocks, it is important to study your pitchers. Place the blocks 10 inches before the shortest stride and 10 inches wider than the longest landing foot. Remember pitchers may pitch from either edge of the rubber. The entire table around the mound should be built with MoundMaster Blocks.
 |
Outline your landing areas and plateau using a mound gauge to obtain the desired slope. Excavate 3" below the surface. Level and tamp firm. |
 |
Excavate the landing area and be 10" wider and longer than the longest stride of your pitchers. Blocks should be within a 1/2" of the surface. |
 |
Wedge the blocks into position 1/2" below the rubber. |
 |
Fill around blocks with adjacent soil and tamp to wedge together. |
 |
Tamp and water thoroughly several times for about an hour. Allow water to be absorbed into clay so blocks swell. Tamp firmly between watering. |
 |
Apply a thin layer of Turface Professional Mound Clay (match color to blocks), moisten and tamp. |
 |
Rake Turface Professional Mound Clay and infield mix over the surface and hand drag. |
 |
To repair holes, cut up blocks or use Turface Professional Mound Clay. Before repairing, sweep out hole to expose pure packing clay. Moisten exposed packing clay, then add repair clay. |
 |
Cover your mound with a plastic tarp to hold moisture. |
Condition the Pitcher's Mound
- Once the entire mound has been rebuilt, spread one or two bags of Turface MVP or Turface Pro League to lightly cover the mound. This can be done with a landscape rake. The Turface helps keep the pitcher's mound moist without being slippery.
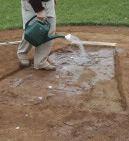
- Lightly moisten the mound.
- Roll the mound with a hand roller, if available.
- Cover the mound with tarp. The tarp is essential to prevent your mound from drying out and from washing into the turf.
Your bull pen mounds should be cared for in the same manner as the field mound. Otherwise, the pitcher's timing and safety are affected.
From Josh Marden, Former Minor League Groundskeeper
With Turface MoundMaster Blocks, you can easily maintain superior pitching and batting surfaces. MoundMaster Blocks are made of high-quality packing clay formed into easy-to-use blocks for excellent durability. By building and maintaining your pitcher's mound and batter's boxes with Turface MoundMaster Blocks, you are providing your athletes with safe and consistent playing surfaces pitch after pitch. A single layer of Blocks will provide the foundation your players need when they take the field.